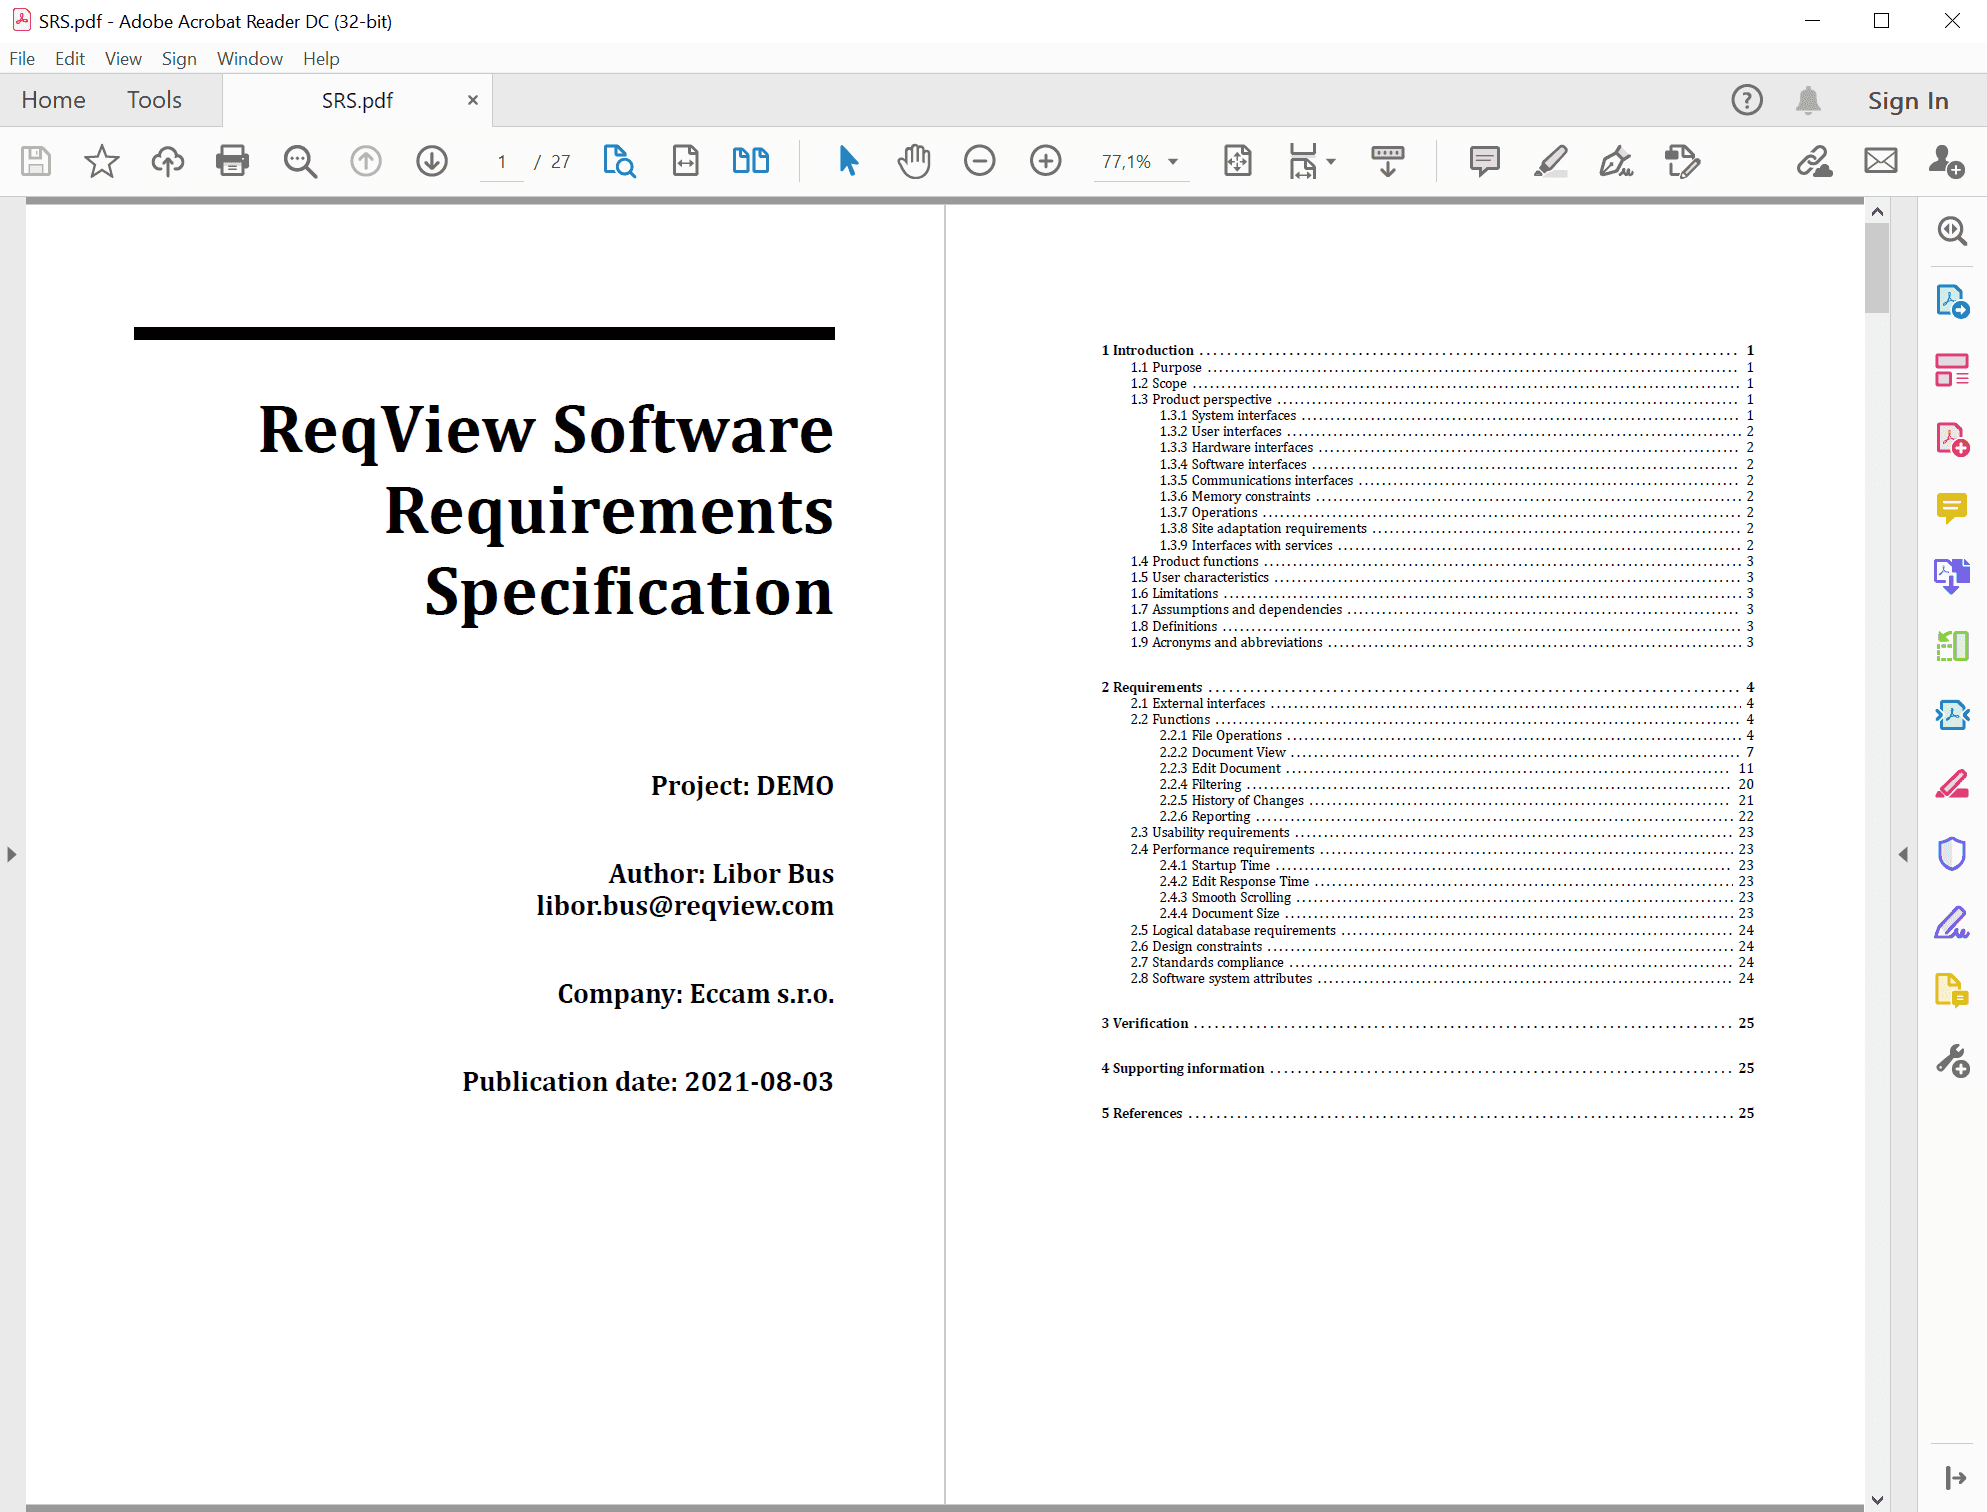
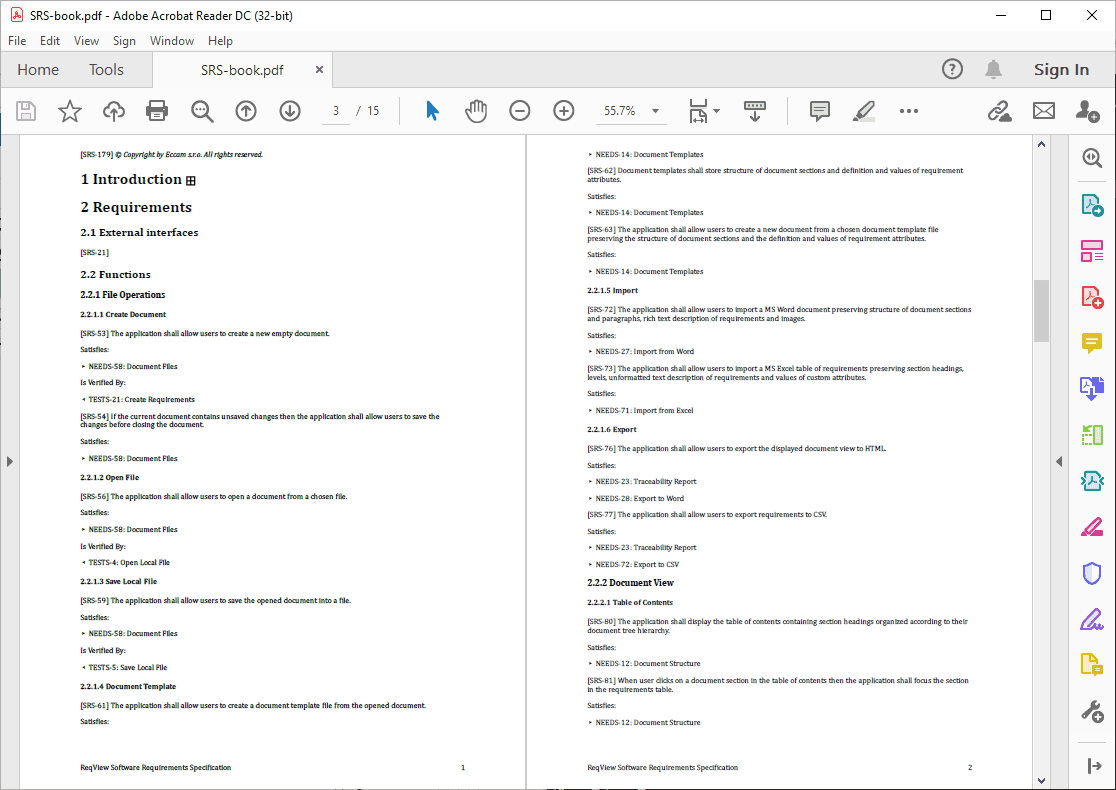
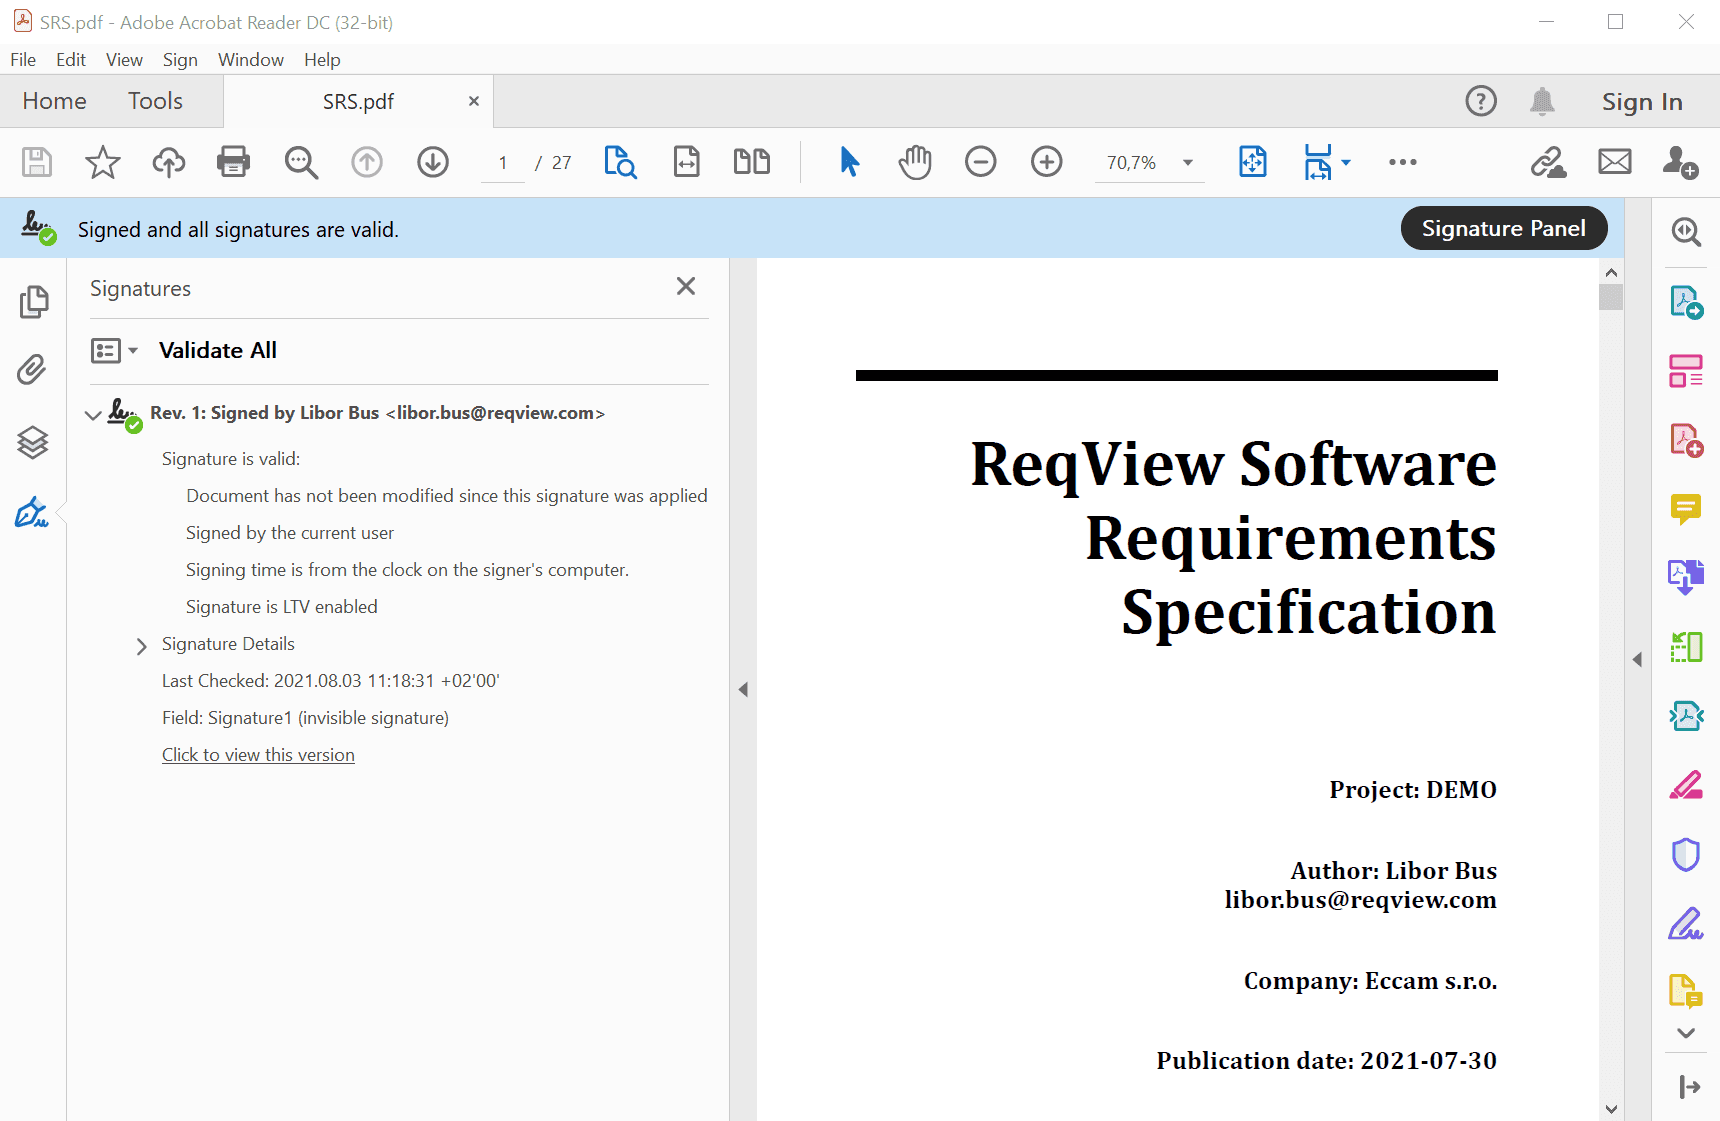
You can export documents with all your image attachments and clickable links within same document to a PDF file for sharing and printing. Optionally, you can add a digital signature to the exported PDF file.
Summary of PDF features:
- Preserve rich text formatting
- Preview image attachments
- Open file attachments by clicking
- Browse links by clicking (within one file)
- Set page layout for print
- Import changes
Note: Export HTML files if you need to browse links between documents or open file attachments by clicking.
Note: PDF export is not available in the WebApp. Please use the native application for Windows, Linux or Mac to use this feature.
Export PDF Files
To export a PDF file, click File, mouseover Export and click PDF File. In the Export PDF dialog, choose exported documents and other options. After confirmation of the dialog, select a destination for storing the exported PDF file.
Export Options
Documents:
Select exported documents:
- Current document — export the current document only.
- Open documents — export all open documents from the main project or loaded linked projects
- All documents from the main project — export all documents from the main project.
- All documents from loaded projects — export all documents from the main project or loaded linked projects.
Table View:
Select a table view defining which attributes or template columns will be exported:
- Current or default view — export open documents using the current table view and closed documents using the default view.
- <table view> — export documents using the selected table view. Documents without the selected table view are exported using the last used or the default table view.
For more information see Table Views.
Layout:
Select layout and styling of exported data:
- Book — export a single column (the displayed columns are stacked as paragraphs) using default styles.
- Custom — export content with custom layout and styles using a custom HTML template, see PDF Template.
Options:
- Merge documents into a single file — if set then all exported documents will be merged into a single PDF file, otherwise a separate file will be created for each exported document (for Open documents and All documents options).
- Merge displayed displayed custom attributes — if set then columns displaying custom attributes will be compacted into a single column (for Custom layout).
- Ignore filter — if the exported table view is filtered then this options controls if the filter is preserved or ignored.
- Ignore sorting — if the exported table view is sorted by a selected column then this option controls if the sort order is preserved or ignored.
- Ignore links to invisible objects — if set then do not include links from / to document objects which are not visible in the exported file (for Book layout).
- Preserve section folding — if set then the content of collapsed sections will be ignored.
- Explore and load linked projects — if set then indirectly linked projects will be explored and loaded to display additional traceability links, see Manage Linked Project.
- Add digital signature — sign the exported PDF file using a provided PKCS#12 certificate, see Digital Signature below.
- Add custom export parameters – pass custom export parameters to your custom template from a selected JSON file, see
exportParamhelper (for Custom layout).
Page Settings:
- Page size — use the selected page size: A3, A4, A5, Legal, Letter, or Tabloid.
- Page orientation — use the selected page orientation Portrait Orientation, or Landscape Orientation.
- Page margins — use the selected page margin: Default Margins, Minimum Margins, or No Margins.
Note: Page settings must be set in the template for Custom layout, see PDF Template.
Note: Navigation between exported PDF files using links is not supported due to limitations of Adobe Acrobat.
Example: Export a Software Requirements Specification (SRS) into a PDF file using the default title page, table of contents, headers, footers and paragraph styles:

Export Configuration
You can export documents to PDF files easily using a shared export configuration storing all export options, see Export Configurations.
Export CLI
You can export documents to PDF files using reqview export pdf command, see Command Line > Export Documents.
PDF Template
You can customize the title page, document order, header and footer, table of contents, or paragraph styles using HTML export templates, see Export Using Custom Templates. To specify page layout, use paged media CSS properties in <style> tag of HTML templates. ReqView exports PDF files using Paged.js library, for more information about styling see Paged.js Documentation.
You can download sample PDF templates from the Export Using Custom Templates > Download Export Templates.
Example: Download and customize PDFBookTemplate.html to generate PDF files with a book layout.

Note: Remove the page break below the table of contents if you you wish to place a page break before each <h1> heading. For instance, delete #toc { page: toc; } from the <style> element of the example template above.
Example: Set page size to A4, page orientation to portrait, a custom margin and output page counters in the page footer.
@media print { @page { size: A4 portrait; margin: 25mm; @bottom-right { content: counter(page); } }}Note: Templates provided by ReqView scale down large images using their width. Without additional CSS rules, tall images that don’t fit in the page vertically even after the width scaling will be cropped. To ensure that all images fit the page, a fixed max-height and width: auto must be added to export template styles. You can also scale images individually using imageSize export helper.
Example: Assuming that PDF page has A3 size and landscape orientation. Set max-height CSS style for attachments to page height with some space left for margins to prevent overflow.
img.attachment { max-width: 90%; max-height: 25cm; height: auto; width: auto; display: block;}Digital Signature
You can digitally sign exported PDF files using a PKCS#12 certificate file stored at your local file system:

To add a digital signature, check Add digital signature option in the Export Options dialog, then browse for a certificate file (with .pfx or .p12 extension), and finally type in your password for the certificate.
You can buy a digital certificate from a publicly trusted certification authority (CA), generate it by your company’s CA or generate a self-signed certificate. See Adobe Digital ID guide or OpenSSL Essentials for more information about working with certificates.
Notes:
- Legal requirements for digitally signed PDF files differ between countries. Businesses and government agencies can also have different requirements. Therefore, the basic signature offered by ReqView might not be suitable for some cases.
- Use a 3rd party PDF digital signature software if you require a legally binding digital signature recognized in the EU. ReqView supports adding a basic digital signature to the exported PDF files with
adbe.pkcs7.detachedsignature format. While European Union PAdES (eIDAS) standard requiresETSI.CAdES.detachedsignature format. - In certain cases, Adobe Reader shows that a digital signature is invalid because of “Invalid policy constraint” error in the certificate chain even with a certificate from a trusted CA, see Adobe Support Community for more info.